AERO-TECH | Using tomorrow's technology to fix today's problems

 |
| Retro-Fix |
| Retro-Fix: a change in design, construction, or equipment as of an ATU already in operation, in order to incorporate improvements or new technology.
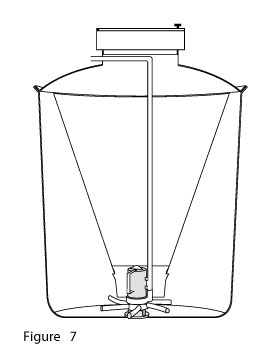
Retro-Fix Installation Instructions 1. Cut the bottom of the existing cone off leaving a 17" diameter opening. Figure 1 2. Remove cone bottom from the tank. Figure 2 3. Measure from bottom of the tank to the bottom of the cone. Figure 3 4. Cut retro-fix cone to 8" off the bottom of the tank. Figure 4 5. Apply a generous amount of silicone to the flange area of the retro-fix cone. Figure 4 6. Push the retro-fix cone downward until it snaps into existing cone. Figure 5 7. Install pump and pipe into tank and attach high water alarm wire to pipe if applicable. Figure 6 8. Install air supply pipe toward house leaving 3 ft. exposed above ground level. Figure 7 9. Hook up wiring to pump. 10. You may have to change air flow switch to current sensor for the aerator alarm circuit. 11. Fill with water and start motor.
|
